
The biggest mistake new hunters make? Walking into the woods on opening morning, picking a random tree, and hoping for the best. While luck plays a part, successful hunters aren’t lucky—they’re prepared. Finding where the animals are before the season starts is called scouting, and it’s the secret to a filled freezer.
Most beginners think hunting is about the “shot,” but 90% of hunting is actually just the “search.”
Here is how to find your spot in two simple phases: The Couch and The Woods.
Phase 1: “E-Scouting” (The Couch Phase)
Before you put on your boots, pull out your smartphone. Apps like onX Hunt, HuntStand, or even Google Earth are your best friends. You are looking for three things: Food, Water, and Cover.
- Identify Boundaries: First, ensure you know where public land ends and private land begins. For private land hunters, find your property lines so you know how far you can go or when to not take the shot in case the animal darts across lines.
- Look for “Edges”: Animals love edges—where a thick forest meets a grassy field, or where a pine thicket meets a hardwood ridge. Look for these transitions on satellite maps.
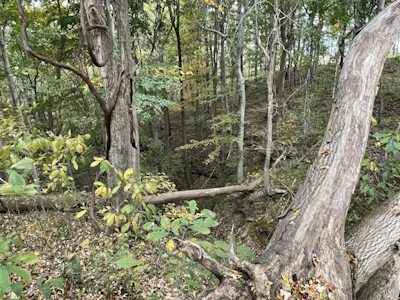
- Find the Funnels or Choke points: Look for “pinched” areas of woods between two fields or a narrow strip of land between two lakes. Animals will naturally travel through these “bottlenecks” to stay hidden.
Phase 2: “Boot Scouting” (The Woods Phase)
Once you’ve marked 2–3 interesting spots on your map, it’s time to go for a hike during the offseason. Your goal is to find “fresh signs” of animal migration.
- The Scat Map: It’s not glamorous, but animal droppings (scat) tell you who is living there and what they are eating. If it looks shiny and moist, the animal was there recently. This is how we learned about a large wildcat on our property and where they like to travel.
- Tracks and Trails: Look for “beaten paths” in the dirt or grass. These are called game trails and act as animal highways. Follow them to see where they lead (usually from a bedding area to a food source).
- Rubs and Scrapes (For Deer): Look for small trees where the bark has been rubbed off. This is a “business card” left by a buck. If you find a cluster of these, you’re in his living room.
Phase 3: The “Wind” Factor
You can find the perfect spot, but if the wind is blowing your scent directly toward the animals, you’ll never see them.
- When you scout a spot, check the prevailing wind direction.
- Plan to sit in a spot where the wind blows from the animal’s expected location to you or “down wind”.
Pro Tip: Scout during the “Golden Hour.” Go to your spot at dawn or dusk (without a gun, during the off-season) and just sit quietly with binoculars. Seeing how animals move naturally when they aren’t being hunted is the best education you can get.
Summary Checklist for your First Scouting Trip:
- [ ] Smartphone with offline maps downloaded.
- [ ] Binoculars.
- [ ] A notepad (or digital pin) to mark where you saw sign.
- [ ] Potentially colored duct tape or some sort of marking for property lines or sitting spots.
- [ ] Patience. If you don’t see sign in the first 30 minutes, keep moving!